You have hundreds of beautiful photos sitting on your phone or computer right now. They deserve to exist in the real world — framed on a wall, tucked in an album, or given as a gift that someone will treasure for years. Online photo printing makes turning those digital images into physical prints easier, more affordable, and higher quality than ever before.
This guide covers absolutely everything you need to know about online photo printing — from choosing the right service to picking the perfect paper finish. Whether you have never ordered a print in your life or you just want sharper, better-value results, you will find practical answers here. By the end, you will feel completely confident placing your first order.

- What Is Online Photo Printing and Why Does It Matter?
- How Online Photo Printing Works — Step by Step
- Best Online Photo Printing Services Compared
- Photo Print Sizes Explained — Which Size Should You Choose?
- Photo Paper Types: Glossy, Matte, Lustre and More
- Image Resolution and File Formats for Online Photo Printing
- How to Edit and Prepare Your Photos Before Ordering
- Printing Photos from Your Phone — A Beginner's Guide
- Online Photo Printing for Special Occasions and Gifts
- Photo Books, Canvas Prints and Wall Art Ideas
- Common Online Photo Printing Mistakes (and How to Avoid Them)
- How to Save Money on Online Photo Printing
- Frequently Asked Questions About Online Photo Printing
- Start Printing Your Photos Online Today
What Is Online Photo Printing and Why Does It Matter?
Online photo printing is the process of uploading your digital photos to a website or app, choosing your preferred sizes and finishes, and then having professional-quality prints delivered straight to your door — or ready to collect at a local store. You do not need a printer at home. You do not need any technical skills. All you need is your photos and an internet connection.
Research consistently shows that physical photos strengthen memory and emotional connection in ways that scrolling through a phone screen simply cannot. A printed photo displayed in your home is seen every day. It triggers conversation, nostalgia, and joy. Digital photos, meanwhile, often disappear into storage and are rarely looked at again.
Online photo printing brings those memories back to life — and the process is far simpler than most beginners expect.
Tip: Start with a small test order of 10–20 prints before committing to a large batch. This lets you evaluate the quality and colours of a new service without spending a lot of money.
How Online Photo Printing Works — Step by Step
The online photo printing process follows a simple, repeatable sequence. Here is exactly what to expect from start to finish.
Step 1: Create an account. Visit the website of the printing service you have chosen. Most services ask you to create a free account using your email address. This saves your order history and makes reordering easy in the future.
Step 2: Upload your photos. Click the upload button and select the photos you want to print. You can usually upload from your computer, your phone’s camera roll, or connected cloud services such as Google Photos, iCloud, Dropbox, or even Facebook. Most services accept JPEG files, and many also accept PNG and TIFF formats.
Step 3: Choose your print options. Select the size, paper finish, and quantity for each photo. Some services also let you apply basic edits — such as brightness or cropping — at this stage.
Step 4: Add to cart and review. Before you check out, review your order carefully. Check that you have the right number of each print and that crops look the way you intended.
Step 5: Pay and choose delivery. Most services offer standard shipping (typically 5–10 business days) as well as faster express options. Some, like Walgreens or CVS, let you pick up prints in store on the same day.
Step 6: Receive your prints. Your prints arrive in protective packaging. Higher-quality services wrap prints in acid-free tissue and rigid mailers to prevent bending.
Tip: Many services offer a free trial or heavy discount on your first order — look for a promo code before you check out.
Best Online Photo Printing Services Compared
Dozens of services offer online photo printing, and the differences between them are significant. Price, quality, paper options, and delivery speed all vary widely. Below is an honest overview of the most popular options, grouped by what they do best.
Best for Quality: Which Services Deliver the Sharpest Prints?
If quality is your top priority, these are the services that consistently earn the highest marks from photographers and reviewers.
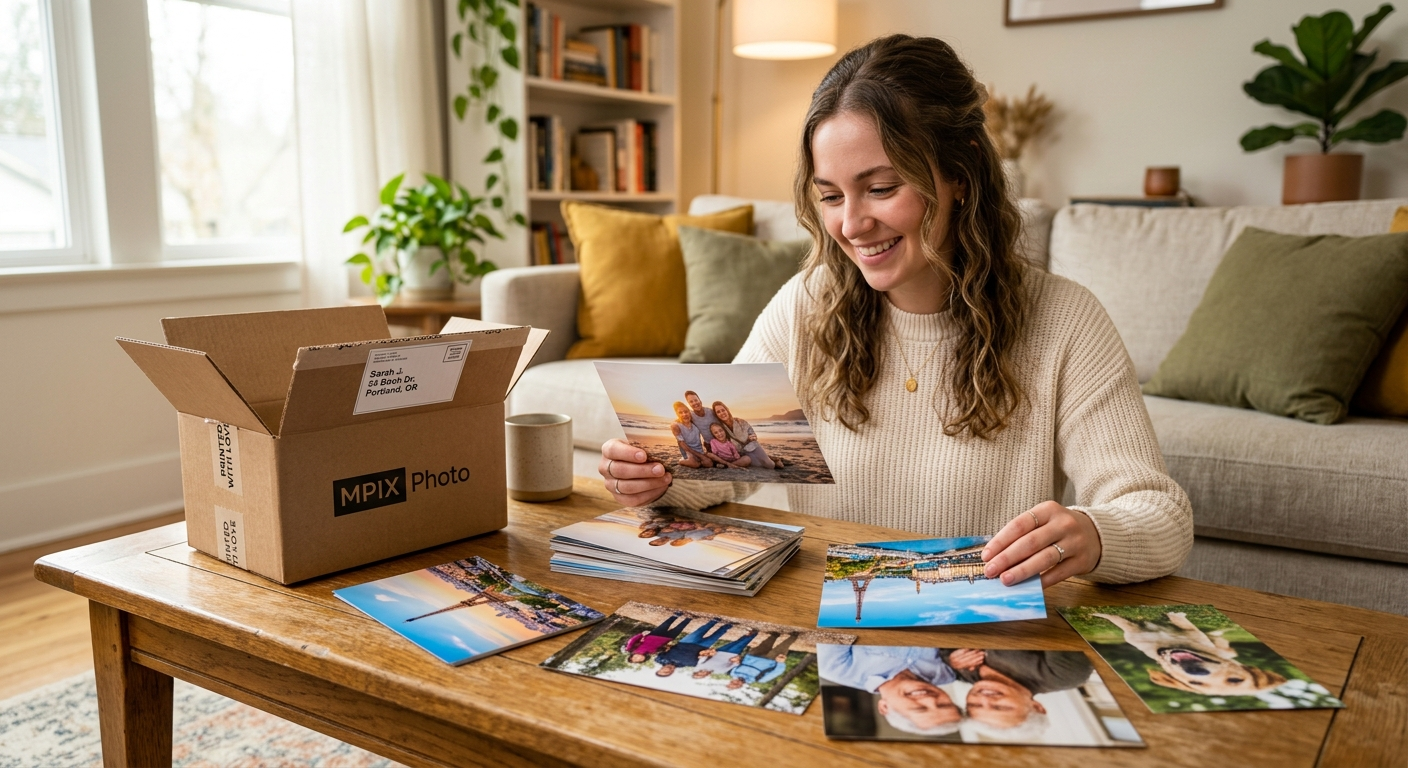
Mpix is widely considered the gold standard for consumer photo printing. It uses professional Fujifilm Lustre paper as its default, offers excellent colour accuracy, and ships prints well-protected in rigid packaging. Prices are slightly higher than budget services, but the results are noticeably better.
Printique (formerly AdoramaPix) is another favourite among photography enthusiasts. It offers a wide selection of premium paper types, including fine art and metallic finishes, and its colour reproduction is outstanding. Printique is especially strong for large-format prints.
Nations Photo Lab consistently delivers sharp, vibrant prints with accurate skin tones — a critical factor for portrait and family photography. It also offers a straightforward, easy-to-use upload process that beginners appreciate.
What sets these services apart technically? They print at high DPI (dots per inch — the number of ink dots placed per inch of paper), use calibrated colour profiles, and source high-quality photographic paper. The result is prints that look like genuine photographs rather than inkjet printouts.
Tip: For once-in-a-lifetime photos — a wedding, a new baby, a holiday of a lifetime — always use a premium service. The extra cost is negligible compared to the value of the memory.
Best for Price: Where to Get Cheap Online Photo Prints
Budget matters, and several services deliver solid quality at very low prices — especially when you order in bulk.
Snapfish frequently offers prints for as low as 9–10 cents each, especially for new customers. Quality is good for everyday snapshots, though colour accuracy is not quite at the level of premium services.
Shutterfly is another affordable option when you use one of their regular 40–50% off promo codes. Their mobile app makes uploading from a phone effortless.
Photobox (popular in Europe) offers competitive pricing and regular sales. It is an excellent choice for large orders such as a year’s worth of family photos.
Walmart Photo offer the lowest per-print prices of all, especially for standard 4×6 prints. Quality varies, but for casual snapshot printing, they are hard to beat on price.
Tip: Never pay full price at a budget service. Coupon sites almost always list active promo codes that cut costs by 30–50%.
Best for Speed: Same-Day and Next-Day Printing Options
Sometimes you need prints fast — for a birthday gift, a last-minute event, or a party happening tomorrow.
Walgreens Photo and CVS Photo both offer same-day in-store pickup. You upload your photos online, pay, and collect them at your nearest branch within an hour. Quality is basic but perfectly acceptable for most uses.
Shutterfly and Snapfish offer rush production for an extra fee, with delivery possible within 2–3 business days.
Mpix offers next-day production, meaning your order goes into the lab the same day and ships the next morning. Combined with express delivery, you can have premium-quality prints in 2–3 days.
Tip: Always check the production time separately from the shipping time. “Ships in 1 day” still means 3–5 days delivery once the courier picks up the parcel.
Photo Print Sizes Explained — Which Size Should You Choose?
Choosing the right print size is one of the most confusing parts of online photo printing for beginners. Here is a clear breakdown of the most common sizes and when to use each one.
| Size | Common Use |
|---|---|
| Wallet 2.5×3.5 (2R) | School photos, wallet inserts |
| 4×6 inches (4R) | Snapshots, albums, sending in cards |
| 5×7 inches (5R) | Framed prints, gifts, desk displays |
| 8×10 inches (8R) | Wall frames, portrait prints |
| 11×14 inches (11R) | Feature wall prints, large portraits |
| 12×18 inches (12R+) | Large landscapes, statement wall art |
The most important thing beginners need to understand is aspect ratio. Aspect ratio is simply the relationship between a photo’s width and height. Most phone cameras take photos in a 4:3 ratio. However, the 4×6 inch print size uses a 3:2 ratio. As a result, printing a phone photo at 4×6 will automatically crop the edges slightly.
This sounds alarming, but it is easy to manage. Most online services show you a preview of exactly how your photo will be cropped before you confirm the order. Always check this preview and adjust the crop manually if the automatic version cuts off something important — like the top of someone’s head.
Tip: For wall display, choose a print size that matches a standard off-the-shelf frame size. The most universally available frame sizes are 4×6, 5×7, and 8×10. This saves you money on custom framing.
Common mistake to avoid: Ordering a large print (11×14 or bigger) from a low-resolution photo. The image will look soft or blurry when printed large. More on resolution below.
Photo Paper Types: Glossy, Matte, Lustre and More
The paper you print on has a bigger impact on the final result than most beginners realise. Here is what you need to know about each finish.

Glossy paper has a shiny, reflective surface that makes colours pop and gives photos a vivid, high-contrast look. It is the finish most people picture when they think of a traditional photograph. However, glossy prints pick up fingerprints easily and can produce glare under bright lighting. They are best for colourful landscapes, travel photography, and vibrant portraits.
Matte paper has a flat, non-reflective surface. It looks softer and more artistic, with muted tones that some photographers prefer. It does not show fingerprints and works beautifully under glass in a frame. Most importantly, matte is the best choice for black-and-white photography — it gives mono prints a clean, gallery-quality appearance.
Lustre / Satin (also called semi-gloss) is the middle ground between glossy and matte. It has a slight sheen without the strong reflectivity of glossy, and it resists fingerprints better. Many professional photo labs use lustre as their default finish because it works well for almost every type of photo. If you are unsure which to choose, start with lustre.
Metallic paper has a pearlescent, almost 3D quality that makes certain photos — particularly those with bright reflections, water, sunsets, or jewellery — look spectacular. It is a premium option and costs more, but the results can be stunning.
Fine Art paper (such as cotton rag or watercolour paper) is used for artistic, archival-quality prints. It is the most expensive option and is aimed at photographers who want gallery-standard results.
Tip: When in doubt, choose lustre. It flatters virtually every type of photo and is the safe, go-to choice for beginners ordering their first prints.
Image Resolution and File Formats for Online Photo Printing
This section might be the most important technical topic in this entire guide. Getting it right is the difference between a print that looks sharp and professional and one that looks blurry and pixelated.
What is DPI?
DPI stands for “dots per inch.” It describes how many tiny ink dots a printer places within each inch of the printed image. The higher the DPI, the finer the detail and the sharper the print. The industry standard for photographic printing is 300 DPI. This is the resolution at which prints look sharp and clear when viewed at a normal viewing distance.
What does this mean for your photos?
To print at 300 DPI, your photo file needs to contain enough pixels (the tiny coloured squares that make up a digital image). Here are the minimum pixel dimensions you need for common print sizes:
| Print Size | Minimum Pixels (300 DPI) |
|---|---|
| 4×6 inches | 1,200 × 1,800 pixels |
| 5×7 inches | 1,500 × 2,100 pixels |
| 8×10 inches | 2,400 × 3,000 pixels |
| 11×14 inches | 3,300 × 4,200 pixels |
| 12×18 inches | 3,600 × 5,400 pixels |
Modern smartphone cameras (iPhone 13 and later, most flagship Android phones) take photos at 12 megapixels or more, which easily provides enough pixels for most print sizes up to 8×10. However, screenshots, images downloaded from websites, and heavily compressed files often lack sufficient resolution for quality printing.
Which file format should you use?
- JPEG (.jpg) — the best choice for most users. It is universally accepted, compact in file size, and maintains excellent quality at high settings. Use JPEG for all standard photo printing.
- PNG (.png) — good for images with text overlays or graphics, as it is lossless (no quality loss from compression). Slightly larger file size than JPEG.
- TIFF (.tiff) — the highest quality option, used by professional photographers. File sizes are large, but quality is uncompromised.
Tip: Never print from a screenshot. Screenshots are low-resolution images that almost always look blurry when printed at any size larger than a wallet print. Always use the original photo file.
Common mistake to avoid: Zooming into a photo on your phone and screenshotting it does not increase its resolution — it simply enlarges a small, low-quality version of the image.
How to Edit and Prepare Your Photos Before Ordering
A little preparation before you order makes a significant difference in your final results. You do not need to be a professional photo editor — a few simple adjustments take only a couple of minutes and can dramatically improve your prints.
Free editing tools worth using:
- Google Photos — simple, free, and available on all devices. Its “Enhance” feature automatically improves brightness and colour in one tap.
- Snapseed (free, iOS and Android) — a powerful mobile editor with tools for brightness, contrast, white balance, and selective adjustments.
- Lightroom Mobile (free version available) — the most capable free editor, used by professionals. Ideal for colour correction and detail enhancement.
- VSCO — popular for its film-inspired filters and clean, artistic look.
Brightness and exposure — If your photo looks too dark or too bright on screen, adjust it before printing. Prints often come out slightly darker than they appear on a backlit screen, so brightening your photos slightly (around +10 to +15 in most editing apps) helps compensate for this.
Key adjustments to make before printing:
Contrast — Increasing contrast slightly makes colours more vivid and detail more defined. This is especially effective for landscape and portrait photography.
White balance / colour temperature — Indoor photos taken under regular light bulbs often look too yellow or orange. Moving the temperature slider towards the cooler (blue) end of the scale fixes this and makes skin tones look more natural.
Crop to the correct aspect ratio — Before uploading, crop your photo to match the aspect ratio of the print size you have chosen. For example, crop to 3:2 for a 4×6 print, or 4:5 for an 8×10 print. Most editing apps let you set a specific aspect ratio when cropping.
Tip: Order a single proof print before placing a large order. This costs almost nothing and confirms that colours, brightness, and crops all look exactly the way you intended.
Printing Photos from Your Phone — A Beginner’s Guide
The vast majority of people who use online photo printing services are ordering from photos taken on their smartphones. Fortunately, the process is straightforward on both iPhone and Android.

From an iPhone: Most online printing services have iOS apps available in the App Store — Shutterfly, Snapfish, Photobox, and Walgreens Photo all offer them. You can also access these services through Safari and upload directly from your Photos app or iCloud. Make sure your photos are saved in full resolution (not the “Optimise iPhone Storage” setting, which stores lower-quality versions on the device).
From Android: The process is similar. Download the printing service’s app from the Google Play Store, or use the browser version of the site. Android phones save photos at full resolution by default, so you usually do not need to change any settings.
What about Google Photos? If you back up your photos to Google Photos, many printing services allow you to connect your Google Photos account directly during the upload step. This is extremely convenient, as it means you can access your entire photo library without downloading individual files first.
Resolution considerations for phone cameras: Modern smartphone cameras produce photos that are more than adequate for printing at standard sizes. An iPhone 15, for example, takes 12–48 megapixel photos depending on the mode — far more than enough for a crisp 8×10 print. However, photos taken on older phones or in low-light conditions may be lower quality and may not print as sharply.
Tip: Turn off “Live Photo” mode on iPhone before taking a photo intended for printing. Live Photos contain video data that can sometimes cause upload issues with printing services.
Common mistake to avoid: Downloading your own photo from a social media post (Instagram, Facebook) and trying to print it. Social platforms heavily compress uploaded images, stripping out most of the pixel data. Always print from the original file on your device.
Online Photo Printing for Special Occasions and Gifts
Online photo printing goes far beyond standard prints. Today’s services offer a remarkable range of personalised products that make genuinely thoughtful, meaningful gifts — and none of them require any design experience to create.
Photo gifts for every occasion:
- Photo mugs — a bestselling gift item. Upload a favourite portrait and have it printed on a ceramic mug. Durable, practical, and deeply personal.
- Photo calendars — assign a different photo to each month of the year. Perfect as a family gift at Christmas, or as a desk calendar for the office.
- Greeting cards — upload a family photo and turn it into a personalised Christmas card, birthday card, or thank-you note. Far more meaningful than a store-bought card.
- Phone cases — print your favourite photo on a protective case for iPhone or Android. Surprisingly high quality and very popular as a teen or young adult gift.
- Photo cushions and blankets — ideal for grandparents who would love a large, soft print of their grandchildren.
Photo Books, Canvas Prints and Wall Art Ideas
Photo books are one of the most popular online photo printing products. You select a collection of photos, arrange them across pages using a drag-and-drop editor, and the service produces a professionally bound hardcover or softcover book. Photo books are perfect for weddings, holidays, baby’s first year, and family reunions. Services like Chatbooks, Artifact Uprising, and Shutterfly offer beautifully designed templates that do most of the layout work for you.
Canvas prints wrap a photo around a stretched wooden frame, producing a piece of wall art that needs no framing. They look modern and striking, and are available in sizes ranging from a small 8×10 up to a large 30×40 inches. Canvas is particularly effective for landscapes, architectural photography, and bold portraits. Services like CanvasDiscount and Canvaspop specialise in this product.

Framed prints come ready to hang, with the print mounted and framed in a choice of wood or metal frames. They are more expensive than unframed prints but save you the effort of sourcing a frame separately.
Wall art collages allow you to combine multiple photos into a single large grid print, a split-panel canvas, or a collection of coordinated frames. These work beautifully in living rooms and hallways.
Tip: For canvas and large-format prints, always use the highest resolution photo available. The larger the print, the more visible any pixelation becomes.
Common Online Photo Printing Mistakes (and How to Avoid Them)
Even experienced users make mistakes when ordering prints. Here are the most common errors, along with simple fixes for each one.
1. Uploading a low-resolution photo This is the most frequent mistake. The printing service may warn you with a yellow or red indicator during upload, but not always. Always check the pixel dimensions of your photo before uploading (on iPhone: Settings > Photos > tap the photo > swipe up to see metadata; on Android: Gallery > Details).
2. Ignoring the aspect ratio crop Most people upload photos without checking the crop preview. The automatic crop sometimes removes important parts of the image — particularly heads in portrait shots. Always review the crop preview and adjust manually if needed.
3. Choosing the wrong paper for the photo type Ordering glossy paper for a black-and-white photo tends to produce flat, underwhelming results. Use matte paper for mono prints. Similarly, metallic paper is wasted on softly lit indoor portraits — save it for images with strong reflections or vivid colour.
4. Not proofreading text overlays If you add text to a photo — a date, a name, a quote — proofread it before clicking buy. Typos on a printed photo cannot be undone, and reprinting costs time and money.
5. Colour profile mismatch (sRGB vs Adobe RGB) Most online printing services print in the sRGB colour space. If your photo editing software saves in Adobe RGB or ProPhoto RGB, the colours may shift when printed — often looking duller or slightly different from what you see on screen. Before uploading, make sure your photos are saved in sRGB. In Lightroom, this is a simple export setting.
6. Ordering too few prints Shipping costs often make small orders expensive per print. Ordering 4 prints at a time can cost almost as much in shipping as ordering 40. Batch your orders to get maximum value from the flat-rate shipping fee.
Tip: Before placing any order, use the service’s zoom tool to check the print preview at 100%. This gives you the most accurate idea of how the final print will look.
How to Save Money on Online Photo Printing
Online photo printing does not have to be expensive. With a few smart habits, you can get excellent prints at a fraction of the headline price.
Order in bulk. Most services charge a flat shipping fee regardless of how many prints you order. Ordering 50 prints costs almost the same to ship as ordering 10. Gather several months’ worth of photos and order them all at once.
Use promo codes. Budget services like Snapfish and Shutterfly run promotions almost constantly. Before checking out, search for the service name plus “promo code” or “coupon” in Google. You will almost always find a code for 40–50% off.
Take advantage of first-order discounts. Most major services offer a heavy discount on your very first order — sometimes free prints plus just the cost of shipping. Use this to evaluate quality before committing to regular ordering.
Sign up for loyalty programmes and newsletters. Services like Photobox and Shutterfly reward repeat customers with points that convert to discounts. Their email newsletters also contain exclusive deals and early access to seasonal sales.
Time your orders around seasonal sales. Black Friday, Cyber Monday, and the period immediately after Christmas are consistently the best times to buy. Photo books and canvas prints often hit their lowest prices of the year during these windows.
Compare prices using a calculator. Prices per print vary enormously across services. A simple spreadsheet comparing cost per print plus estimated shipping — for your typical order size — will quickly show you which service offers the best value for your specific needs.
Tip: Check whether your printer offers a free shipping threshold. Spending an extra few dollars to hit the free shipping minimum is almost always worth it compared to paying a flat shipping fee.
Frequently Asked Questions About Online Photo Printing
How much does online photo printing cost?
Prices vary widely depending on the service and the print size. Standard 4×6 prints typically range from 9 cents (budget services like Snapfish with a promo code) to around 40–50 cents each at premium services like Mpix. Larger sizes, canvas prints, and photo books are proportionally more expensive. Shipping adds a flat fee of typically $3–$7 for standard delivery.
What resolution do I need for a good photo print?
For a sharp, professional-looking print, your photo should have enough pixels to print at 300 DPI. For a 4×6 print, you need at least 1,200×1,800 pixels. For an 8×10 print, you need at least 2,400×3,000 pixels. Most modern smartphone cameras produce photos with far more pixels than this, so resolution is rarely a problem unless you are printing from screenshots or social media downloads.
Can I print photos online from my phone?
Yes, absolutely. All major online photo printing services have mobile apps or mobile-optimised websites that make it simple to upload photos directly from your phone’s camera roll. Services like Shutterfly, Snapfish, and Walgreens Photo have dedicated apps for both iPhone and Android.
How long does online photo printing take?
Delivery time depends on the service and the shipping option you choose. Standard orders typically take 5–10 business days from order to delivery, including production time (1–2 days) and shipping (3–7 days). Express options can reduce this to 2–3 days. Same-day in-store pickup is available at services like Walgreens Photo and CVS Photo.
What is the best paper finish for photo prints?
For most photos, lustre (satin) is the best all-round choice — it offers vivid colours without the heavy glare of glossy paper, and it resists fingerprints better. Choose glossy for colourful, vibrant shots where you want maximum impact. Choose matte for black-and-white photography or photos that will be displayed under glass in a bright room.
Can I print photos online and pick them up in store?
Yes. Services like Walgreens Photo, CVS Photo, and Walmart Photo offer same-day in-store pickup. You upload your photos online, complete your order, and collect your prints at a nearby branch within an hour. This is ideal when you need prints quickly for a gift or event.
What file format should I use for online photo printing?
JPEG (JPG)is the best and most widely accepted format for online photo printing. It produces small file sizes without significant quality loss, and every printing service accepts it. If you have edited your photos in Lightroom or a similar app, export as JPEG at 100% quality in the sRGB colour profile for optimal results.
Start Printing Your Photos Online Today
Online photo printing is one of the simplest, most satisfying things you can do with your digital photo library. You now know how to choose the right service for your needs, how to prepare your photos for the best possible results, which paper finishes work for different types of images, and how to avoid the common mistakes that catch beginners out.
The most important step is the first one. Pick a service, choose 10–20 of your favourite photos, and place a test order. The results will almost certainly exceed your expectations — and you will wonder why you waited so long to print them.
Your memories are worth more than a phone screen.