Have you ever edited a photo on your computer, only to find that it looks completely different when printed or viewed on another screen? If so, your monitor is almost certainly uncalibrated. Monitor calibration is the process of adjusting your display so that the colors, brightness, and contrast it shows are as accurate and consistent as possible. Moreover, a properly calibrated monitor ensures that what you see on your screen closely matches real-world output, whether you are printing photos, designing graphics, or editing videos.
Fortunately, calibrating your monitor is not as complicated as it sounds. In fact, even a beginner can achieve excellent results by following a simple, step-by-step process. Throughout this guide, you will learn what monitor calibration is, why it matters, what tools you need, and exactly how to do it yourself. Furthermore, you will discover both free software methods and hardware-based approaches, so you can choose the solution that best fits your budget and goals.

By the end of this tutorial, your screen will display colors the way they were meant to be seen.
- Section 1: Understanding Monitor Calibration
- Section 2: Tools You Need for Calibration
- Section 3: Key Calibration Settings Explained
- Section 4: Step-by-Step Guide to Calibrating Your Monitor
- Section 5: Calibration for Specific Use Cases
- Section 6: Maintaining Your Calibration Over Time
- Section 7: Troubleshooting Common Calibration Problems
- Section 8: Advanced Tips and Best Practices
- Conclusion: Take Control of Your Colors Today
- Quick Reference: Recommended Calibration Targets
Section 1: Understanding Monitor Calibration
What Is Monitor Calibration?
Monitor calibration is the systematic process of measuring and adjusting a display’s output so that it conforms to a known color standard. In other words, it aligns your screen’s colors, brightness (luminance), contrast, and white point with industry-accepted values. As a result, images and videos appear consistent and accurate no matter where or how they are ultimately used.

When manufacturers ship monitors, they configure the display with average factory settings. However, these default settings are rarely optimal. Additionally, displays drift over time as backlights age and components change. That is why calibration is not a one-time task but rather an ongoing maintenance practice.
Key Term: Color Profile (ICC Profile) — A file that describes your monitor’s color behavior so that applications like Photoshop, Chrome, and Windows can interpret colors correctly.
Who Needs to Calibrate Their Monitor?
Monitor calibration is essential for a wide range of users. Specifically, it is critical for:
- Photographers and photo editors who need accurate skin tones and shadow detail
- Graphic designers who produce work that must match brand colors precisely
- Video editors who grade footage for cinema or broadcast
- Print professionals who need on-screen colors to match physical output
- Gamers who want rich, realistic visuals without washed-out or over-saturated colors
Even if you are a casual user, calibration improves your daily viewing experience significantly. Therefore, virtually anyone who uses a monitor regularly can benefit from this process.
How Monitors Display Color: The Basics
Before you calibrate, it helps to understand how your monitor produces color. Most modern monitors use either LCD (Liquid Crystal Display) or OLED (Organic Light-Emitting Diode) technology. LCD panels use a backlight that shines through liquid crystals and color filters to create pixels. OLED panels, on the other hand, produce light directly from organic compounds, resulting in deeper blacks and higher contrast.

Regardless of panel type, monitors combine red, green, and blue (RGB) sub-pixels to create every color you see. The intensity of each sub-pixel is controlled by values from 0 to 255. Consequently, calibration adjusts how your monitor translates these numeric values into actual light, ensuring that a value of 128 on your screen matches a value of 128 on every other calibrated display.
Tip: Panel type matters for calibration. IPS panels offer the widest viewing angles and most accurate factory colors. TN panels are fast but less color-accurate. VA panels provide excellent contrast. OLED panels offer near-perfect black levels.
Section 2: Tools You Need for Calibration
Software-Based Calibration Tools (Free)
If you are just starting out, or if budget is a concern, software-based calibration tools are an excellent place to begin. These tools guide you through a series of visual tests and adjustments using your eyes as the measuring instrument. While they are not as precise as hardware solutions, they still deliver a noticeable improvement over factory defaults.
Here are the most widely recommended free tools:
- Windows Display Color Calibration — Built into Windows 10 and 11. Navigate to Settings > Display > Advanced Display Settings > Display Adapter Properties > Color Management to access it. Then press Advanced > Display Calibration > Calibrate display.

- macOS Display Calibrator Assistant — Built into macOS. Go to System Preferences > Displays > Color > Calibrate to launch the wizard.
- DisplayCAL (Free & Open Source) — Available at displaycal.org. A powerful free tool that works with hardware colorimeters and provides professional-level profiling.
- Online Monitor Test — Visit lagom.nl/lcd-test for a comprehensive suite of browser-based visual test patterns covering contrast, sharpness, and color gradients.
Hardware Colorimeters (Recommended for Accuracy)
For true accuracy, especially in professional workflows, you need a hardware colorimeter or spectrophotometer. These devices attach to your screen and measure the actual light output, removing the subjectivity of visual adjustments entirely. Furthermore, they work automatically with calibration software, making the process faster and far more repeatable.

The most popular hardware options include:
- X-Rite i1Display Pro — Industry-standard colorimeter trusted by professional photographers and colorists worldwide. More details at xrite.com.
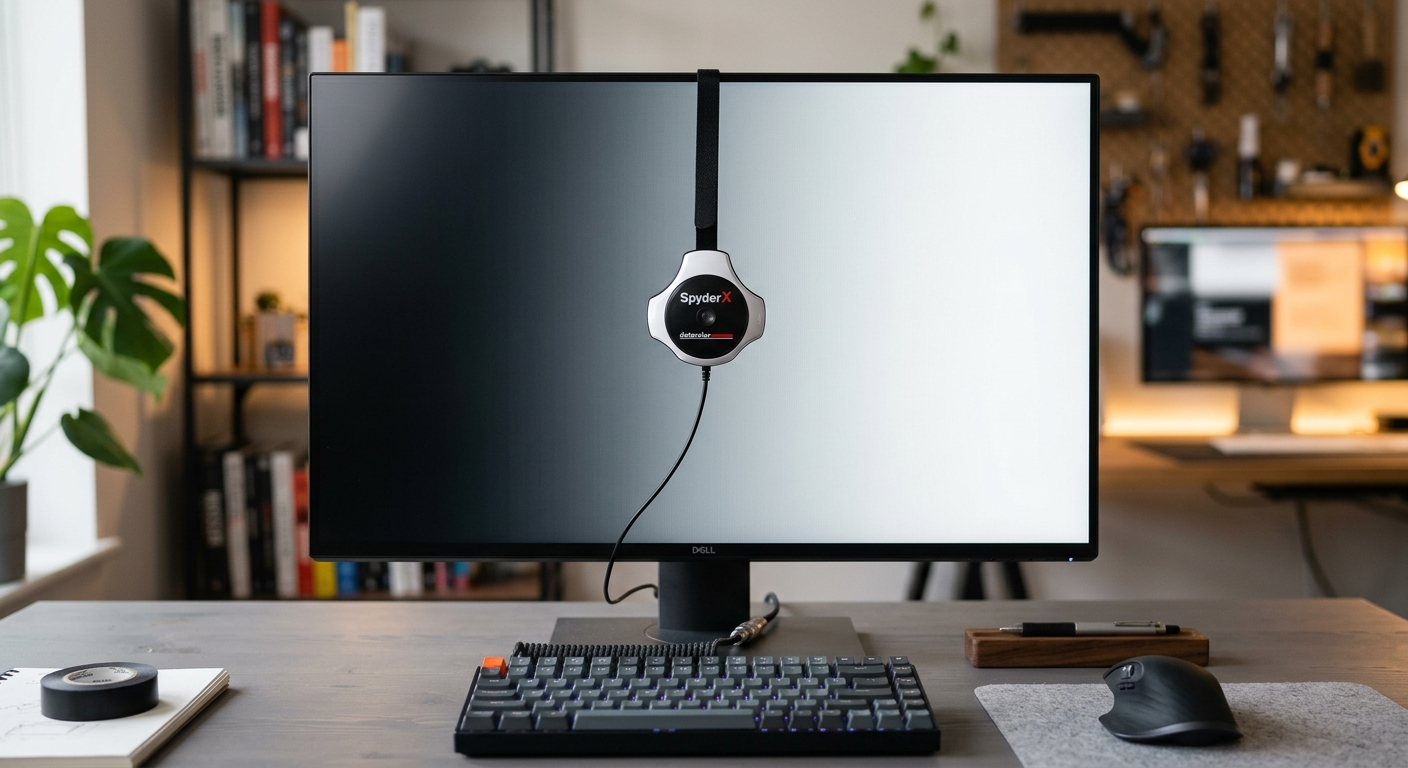
- Datacolor Spyder X Pro — A popular mid-range colorimeter with an easy-to-use interface, suitable for photographers and designers. Visit datacolor.com for more information.
- X-Rite ColorMunki Display — An affordable entry point for hardware calibration that still delivers excellent results for home users. More details at xrite.com.
Tip: Many public libraries, universities, and photography clubs lend out colorimeters for free or at low cost. Check with your local institution before purchasing.
What Else Do You Need?
Before you begin calibrating, gather the following:
- A monitor that has been running for at least 30 minutes (displays need warm-up time to reach stable output levels)
- A darkened or consistently lit room (avoid direct sunlight on the screen during calibration)
- Access to your monitor’s OSD (On-Screen Display) menu, accessible via hardware buttons on the monitor itself
- Your monitor’s user manual or manufacturer’s website for default settings (useful for resetting before calibration)
Section 3: Key Calibration Settings Explained
Brightness and Luminance
Brightness, also called luminance, controls how much light your monitor emits. Consequently, it directly affects how bright whites appear and whether shadow detail is visible in dark images. The ideal luminance level depends on your environment. For office and home use in a normally lit room, aim for a luminance of 80–120 cd/m² (candelas per square meter). For graphic arts in a controlled studio, 80 cd/m² is the industry-standard target.
Additionally, many people mistakenly confuse the monitor’s brightness control with the overall image brightness. In reality, you should also use your graphics card’s gamma settings to manage how midtones are rendered, rather than relying solely on the brightness slider.
Contrast Ratio
Contrast ratio measures the difference between the darkest black and the brightest white your monitor can display. A higher native contrast ratio generally means more vivid images and better visible detail in both highlights and shadows. However, cranking the contrast control too high clips bright details, causing whites to look blown out with no texture or gradation.
During calibration, set your monitor’s contrast control to a level where a white object shows full detail without appearing gray, and a near-black gradient shows at least the first few steps of tone. Typically, a contrast setting between 70 and 80 on most monitors achieves this balance well.
White Point (Color Temperature)
The white point defines what “white” looks like on your monitor. It is measured in Kelvin (K). A lower color temperature (e.g., 5000K) produces a warm, yellowish white, while a higher temperature (e.g., 9300K) produces a cool, bluish white. The most widely used standard for monitors is D65, which equals 6500K. This value represents average daylight and is the reference point for most color standards, including sRGB and Rec. 709 (the standard for HD video).
Therefore, unless you have a specific reason to use a different white point, always calibrate to D65 (6500K). This setting ensures your content looks consistent across all calibrated devices and matches printing standards most closely.

Important: Many budget monitors ship with a default color temperature of 9300K, which looks bright and impressive in a showroom but is far too cool for accurate color work. Always reset to 6500K before calibrating.
Gamma
Gamma describes the relationship between a pixel’s numeric value and its displayed brightness. In simpler terms, it controls how midtones look. The standard gamma for most computer monitors and web content is 2.2. At gamma 2.2, the tonal transitions between dark and light areas look natural and perceptually even. Moreover, Windows and most web browsers assume a gamma of 2.2 when displaying images.

If your monitor’s gamma is too low, shadows will look muddy and dark. If it is too high, shadows will look too light and detail will be lost. Therefore, ensuring your monitor is calibrated to gamma 2.2 is one of the most important steps in the entire calibration process.
Color Gamut
Color gamut refers to the range of colors a monitor can display. The most common standard is sRGB, which covers approximately 72–75% of the NTSC color space and is the default gamut for virtually all web content, consumer photography, and standard video. Wide-gamut monitors can display a broader range of colors, including those used in the DCI-P3 standard (common in cinema) and Adobe RGB (common in professional photography).
For most beginners, calibrating to sRGB is the safest and most compatible starting point. However, if you own a wide-gamut monitor and work in print photography or video production, calibrating to Adobe RGB or DCI-P3 respectively will give you access to richer, more vibrant colors while maintaining accuracy.
Section 4: Step-by-Step Guide to Calibrating Your Monitor
Step 1 — Prepare Your Environment
Before touching any settings, preparing your workspace correctly makes a significant difference in the quality of your calibration. First, position your monitor so that no direct light source reflects off the screen. Next, if possible, dim the room to a consistent, moderate level rather than working in complete darkness (your eyes adapt differently in total darkness, which skews visual judgments).
Furthermore, allow your monitor to warm up for at least 30 minutes before calibrating. During this warm-up period, the backlight reaches a stable operating temperature, which ensures the measurements you take actually represent normal working conditions.
Step 2 — Reset Your Monitor to Factory Defaults
Before calibrating, always reset your monitor to its factory default settings. This removes any previous adjustments that might interfere with the calibration process. To do this, press the physical buttons on your monitor to access the OSD menu (On-Screen-Display). Look for an option labeled ‘Reset‘, ‘Factory Reset‘, or ‘Default Settings‘ and confirm.
Additionally, set your monitor’s preset mode to sRGB, Standard, or Custom (not ‘Game Mode’, ‘Cinema Mode’, or any other enhancement mode). These enhanced modes artificially alter colors and will make accurate calibration impossible.
- Press the monitor’s OSD button (usually located on the bottom or side of the screen)
- Navigate to the “Setup” or “System” menu
- Select “Factory Reset” or “Reset All“
- Confirm the reset and wait for the monitor to restart
- Re-enter the OSD and set Color Mode to ‘sRGB’ or ‘Standard’
Step 3 — Adjust Brightness (Luminance)
To set brightness correctly, open a browser or image viewer and display a near-black test image — one that contains a very dark grey gradient from pure black upward. Your goal is to see the first one or two gradient steps just barely above pure black, while pure black itself appears as deep, dark black with no glow.
Then, open an all-white image and ensure that white appears genuinely bright and clean without any yellow, blue, or grey cast. Adjust the monitor’s brightness control (in the OSD) until you reach a comfortable, balanced luminance. In a normally lit office, 100 cd/m² is a reliable target.
Visual Test: Use the free test patterns at lagom.nl/lcd-test/contrast to evaluate contrast and brightness simultaneously. The patterns are designed to reveal exactly how well your shadows and highlights are rendering.
Step 4 — Adjust Color Temperature to 6500K (D65)
Inside your monitor’s OSD menu (On-Screen-Display), navigate to the color temperature or white balance setting. Select the preset closest to 6500K. On many monitors, this is labeled “D65“, “Warm“, or “Standard“. Alternatively, if your OSD allows manual RGB adjustments, you can fine-tune the red, green, and blue gain channels individually.

To visually verify that your white point is correct, display a pure white image and stand back from the screen. The white should look neutral — neither warm (orange-yellow) nor cool (blue). A perfectly neutral white at D65 appears clean and paper-like.
Step 5 — Use Windows or macOS Built-In Calibration Wizard
Once you have adjusted the physical OSD settings, run your operating system’s built-in calibration wizard to fine-tune gamma and color through the software layer.
On Windows 10 / 11:
- Open Settings and go to System > Display
- Scroll down and click “Advanced Display Settings“
- Click “Display Adapter Properties” for your monitor
- Go to the “Color Management” tab and click “Color Management…“
- Click the “Advanced” tab, then “Calibrate Display“
- Follow the on-screen wizard to set gamma, brightness, contrast, and color balance

On macOS Ventura / Sonoma / Sequoia:
- Open System Settings and click “Displays“
- Click “Color Profile“, then click “Customize…“
- Check “Show profiles for this display only” if desired
- Click the “+” button to add a new profile and follow the Display Calibrator Assistant
- Name your profile and save it
Step 6 — Calibrate with DisplayCAL and a Colorimeter (Recommended)
If you have access to a colorimeter, using DisplayCAL is by far the most accurate approach. DisplayCAL is a free, open-source application that automates the entire calibration process. It eliminates guesswork entirely, because the colorimeter measures actual screen output rather than relying on your visual judgment.

- Download and install DisplayCAL from displaycal.org(free, available for Windows, macOS, and Linux)
- Install the Argyll CMS driver package when prompted (DisplayCAL will guide you)
- Plug in your colorimeter and attach it to your monitor screen
- Launch DisplayCAL and select your colorimeter from the instrument dropdown
- Set your calibration target:
- White Point = D65
- Gamma = 2.2
- Luminance = 80–120 cd/m²
- Click “Calibrate & Profile” and let the software run (this takes 15–45 minutes)
- When complete, click “Install Profile” to activate your new ICC color profile
Why it works: The colorimeter measures hundreds of color patches on your screen, then builds a mathematical profile that describes exactly how your monitor behaves. Software like Photoshop, Lightroom, and your OS then use this profile to display colors accurately.
Step 7 — Verify and Validate Your Calibration
After calibrating, always validate your work. Simply look at a few reference images to check the results. For example, view a well-known photograph you are familiar with, such as a landscape or portrait with known skin tones. The image should look natural, balanced, and neither over-saturated nor dull.
Additionally, visit the Lagom LCD Test website and run through the full suite of test patterns. Pay particular attention to the black level, white saturation, and color gradient tests. If everything looks correct, your calibration is successful.
Section 5: Calibration for Specific Use Cases
Calibration for Photo Editing
Photo editing demands the highest level of color accuracy. Therefore, photographers should always calibrate to the sRGB or Adobe RGB standard, depending on their output target. If you primarily share photos online, calibrate to sRGB. If you produce large-format prints or supply images to magazines, calibrate to Adobe RGB to take advantage of the wider color gamut.
Furthermore, set your luminance to exactly 80 cd/m² when editing for print, as this level most closely matches the apparent brightness of a print viewed under standard D50 gallery lighting. Recalibrate every four to six weeks to compensate for monitor drift.

Calibration for Video Editing
Video editors working with standard HD content should calibrate to the Rec. 709 standard, which uses a D65 white point and a gamma of 2.4 (slightly different from the 2.2 gamma used for still images). Moreover, video editors who work with HDR (High Dynamic Range) content need to consider additional standards, including PQ (Perceptual Quantizer) or HLG (Hybrid Log-Gamma).
For HDR work, you will typically need a specialized HDR-capable monitor with hardware calibration support. Check the documentation for your specific monitor to determine compatibility. A helpful resource for understanding video color standards is the Colour & Vision Research Laboratory at UCL.
Calibration for Gaming
Gamers have slightly different priorities from photographers. While color accuracy remains important, low input lag and smooth motion are equally critical. Therefore, when calibrating a gaming monitor, avoid enabling response-time enhancement features that add color processing lag.
Start by disabling all dynamic contrast and HDR modes in games and switching to sRGB mode in the monitor’s OSD. Then calibrate as described in the steps above. As a result, you will enjoy games with accurate colors and natural-looking visuals without sacrificing performance.
Calibration for Office and General Use
For everyday office work, web browsing, and document editing, a less rigorous calibration is perfectly adequate. Simply run the Windows or macOS calibration wizard, set the color temperature to 6500K, and adjust brightness to a comfortable level for your ambient lighting. Consequently, your eyes will feel less fatigued during long working sessions.
Additionally, consider enabling your operating system’s night mode or blue light filter in the evenings to reduce eye strain after dark, but remember to disable it before doing any color-critical work.
Section 6: Maintaining Your Calibration Over Time
How Often Should You Recalibrate?
Monitor displays drift over time. Specifically, the backlight in LCD monitors dims and shifts color as it ages, while OLED panels may experience uneven pixel aging. For this reason, regular recalibration is essential to maintain accuracy.
As a general guideline:
- Professional photographers and colorists: recalibrate every 2–4 weeks
- Designers and video editors: recalibrate every 4–6 weeks
- Casual users: recalibrate every 3–6 months
Furthermore, you should recalibrate immediately any time you move your monitor to a new location, change your room’s ambient lighting significantly, or update your graphics driver or operating system, as these changes can all shift color rendering.

Protecting Your Calibration Profile
Once you have created an ICC profile, it is important to protect it. First, back up the profile file to an external drive or cloud storage.
On Windows, ICC profiles are stored in
C:\Windows\System32\spool\drivers\color.
On macOS, ICC profiles are stored in
/Library/ColorSync/Profiles or ~/Library/ColorSync/Profiles.
Additionally, avoid installing third-party display drivers or display enhancement software that might override your ICC profile automatically. Some gaming overlay tools and monitor management utilities are known to reset color profiles without warning.
Checking for Monitor Drift
Even without a colorimeter, you can check for monitor drift visually by keeping a reference test image saved on your computer. Periodically compare this image to how it looked immediately after your last calibration. If colors look noticeably warmer, cooler, darker, or lighter than you remember, it is time to recalibrate.
Moreover, you can use the free service at Photo Friday’s Monitor Calibration Page to run a quick visual check between formal calibration sessions.
Section 7: Troubleshooting Common Calibration Problems
Colors Look Too Yellow or Too Blue After Calibration
If your screen looks too warm (yellow) after calibration, your white point is set below D65. Navigate to your monitor’s OSD and increase the color temperature slightly. Conversely, if it looks too cool (blue), decrease the color temperature. Additionally, if you used the Windows calibration wizard, re-run it and pay special attention to the color balance screen.
The Calibration Profile Is Not Being Applied
Sometimes Windows fails to load an ICC profile at startup. To fix this, download the free and open source utility called ICC Profile Loader by Elle Stone and add it to your startup programs. This ensures your profile loads correctly every time your computer boots. The full source code of the tool is available on Github.
On macOS, open the ColorSync Utility (found in Applications > Utilities) to verify that your profile is assigned to the correct display. Furthermore, ensure that your profile is set as the default, not just installed.
My Photos Look Different in Different Applications
If your photos look correct in one application (e.g., Lightroom) but wrong in another (e.g., a web browser), the issue is likely that the second application is not color-managed. Specifically, it is ignoring your ICC profile and rendering colors in a generic, uncorrected way.
The solution is to enable color management in your browser. For example, Google Chrome and Firefox both support ICC profiles automatically on modern versions. However, if you are using an older browser or a basic image viewer, colors may appear different. Always use a color-managed application for critical color work.
The Screen Looks Correct But Prints Look Wrong
If your monitor looks calibrated but prints do not match, the problem may not be your monitor calibration at all. Instead, the issue could be your printer’s ICC profile, your print driver settings, or the paper profile. Visit the ICC.org Color Management Resources for detailed guidance on end-to-end color management workflows including monitor-to-print matching.
Section 8: Advanced Tips and Best Practices
Multiple Monitor Setups
If you work with two or more monitors, calibrating each one individually and ensuring they match each other is critical. Without calibration, side-by-side monitors can look dramatically different, making it difficult to move windows between them without seeing a sudden color shift.
Calibrate each monitor separately using a colorimeter and DisplayCAL. Then compare a neutral grey image side by side on both screens. Both monitors should display the same neutral grey. If they do, your multi-monitor setup is successfully calibrated. Additionally, use your OS display settings to assign the correct ICC profile to each monitor independently.
Calibrating Laptop Displays
Laptop displays present unique challenges. Because laptops are used in a wide variety of ambient lighting conditions — from bright sunlight to dim bedrooms — it is harder to maintain consistent calibration. Nevertheless, calibrating your laptop display is still worthwhile, especially for photo or video work.
When calibrating a laptop, always do so in a moderately lit, controlled environment. Disable automatic brightness adjustment (which most laptops enable by default) during calibration.
On Windows, go to Settings > System > Display > Brightness and turn off “Change brightness automatically when lighting changes“.
On macOS, go to System Settings > Displays and uncheck “Automatically adjust brightness“.
Using Adobe Photoshop’s Soft Proofing Feature
Once your monitor is calibrated, you can use Adobe Photoshop’s soft proofing feature to simulate how your images will look on a specific output device. Soft proofing uses ICC profiles to preview the appearance of your image when printed on a particular printer with a specific paper type.
To enable soft proofing in Photoshop, go to View > Proof Setup > Custom, and then select the ICC profile for your intended output. This powerful feature allows you to make precise color adjustments before printing, saving both time and expensive paper. Learn more at Adobe’s official Photoshop documentation.
The Role of Ambient Lighting
Ambient lighting in your workspace affects how you perceive colors on your monitor. Ideally, walls behind your monitor should be painted a neutral grey, and your room should be lit with D65-balanced daylight bulbs. Bright or colored walls create reflections on your screen that bias your color perception.
Furthermore, if you work in print production, it is worth investing in a D50 or D65 viewing booth to evaluate physical prints under controlled, standardized light. This ensures that when you compare your screen to a print, both are being viewed under conditions that are as consistent as possible. Many professional products for this purpose are available at GTI Graphic Technology.
Conclusion: Take Control of Your Colors Today
Monitor calibration is one of the most impactful improvements you can make to your digital workflow, and yet it remains one of the most overlooked. By following the steps in this guide, you have learned how to prepare your workspace, understand key calibration parameters, use free built-in tools, and apply professional hardware-based calibration with DisplayCAL.
Moreover, you now understand how to maintain your calibration over time, troubleshoot common issues, and apply advanced techniques for multi-monitor setups, laptop displays, and specific use cases like photography, video, and gaming.
Most importantly, calibrating your monitor gives you confidence. When you make creative decisions — choosing a color, retouching a photo, grading a video — you can trust that what you see accurately represents the finished product. That trust is invaluable.
Start with the free tools built into your operating system today. Then, when you are ready to take accuracy to the next level, invest in a colorimeter and explore DisplayCAL. Your eyes — and your clients — will thank you.
Quick Reference: Recommended Calibration Targets
| Setting | Recommended Value | Notes |
| White Point | D65 (6500K) | Universal web & print standard |
| Gamma | 2.2 (Gamma 2.4 for video) | Do not confuse with brightness |
| Luminance | 80–120 cd/m² | 80 cd/m² for print matching |
| Color Gamut | sRGB (or Adobe RGB) | sRGB for web; Adobe RGB for print |
| Recalibration | Every 4–6 weeks | More often for critical work |