From Snapshot to Keepsake
How Big Is a Wallet Size Photo? Sizes, Standards, and How to Print One at Home
Step-by-Step Guide to Printing Wallet Photos
Whether you need to share a portrait with a loved one, prepare a professional headshot, or simply keep a favourite memory close, the wallet size photo remains one of the most personal and versatile print formats. Yet many people are unsure exactly how big a wallet size photo is, what resolution it requires, or how to produce a perfectly cropped, beautifully printed copy at home.
This guide answers every question you have about the wallet size photo — and shows you, step by step, how to create, edit, print, and export one using ImagePrint.
- What Is a Wallet Size Photo and Why Does It Matter?
- Standard Wallet Size Photo Dimensions Explained
- Why Choosing the Correct Wallet Photo Size Matters
- Wallet Photo Size Compared to Other Common Photo Formats
- Capturing the Best Photos for Wallet Printing
- Step-by-Step Guide to Preparing Wallet Size Photos in ImagePrint
- How to Print Your Wallet Size Photos in ImagePrint
- How to Export Wallet Photos to PDF
- Creative and Modern Ways to Use Wallet Size Photos
- Avoiding Common Mistakes with Wallet Size Photos
- Tips for Keeping Wallet Photos Looking Great Over Time
- Final Thoughts on Mastering Wallet Size Photos
- Frequently Asked Questions About Wallet Size Photos
What Is a Wallet Size Photo and Why Does It Matter?
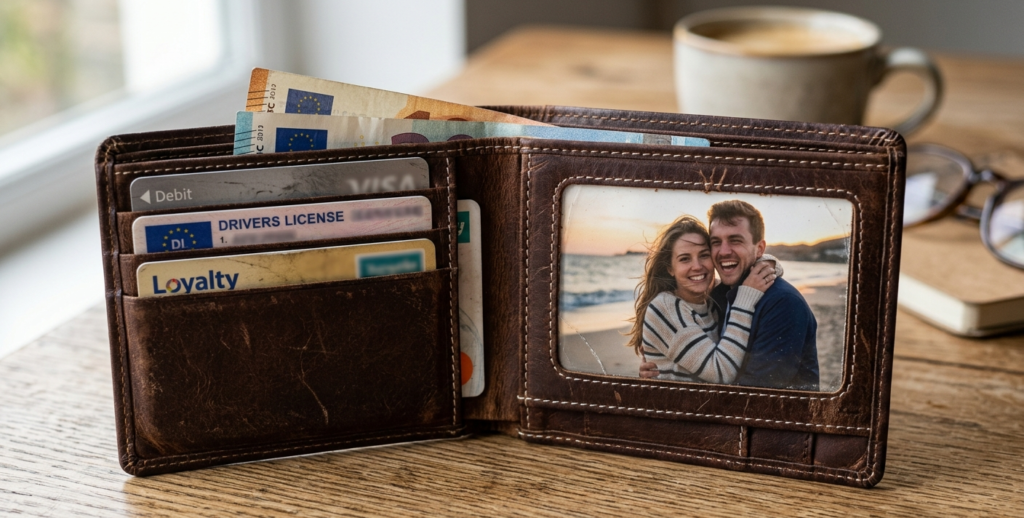
A wallet size photo is a small printed photograph designed to fit inside a wallet, purse, or cardholder. Because of its compact dimensions, it acts as a portable keepsake — ideal for graduation portraits, family milestones, professional headshots, pet photos, or any image you want to carry with you every day.
Beyond personal use, the wallet size photo has practical applications. Schools, sports teams, and professional organisations frequently request wallet prints for directories, ID booklets, and team cards. Photographers traditionally include a sheet of wallet prints as part of a portrait package, and parents exchange them at family gatherings. Even in the digital age, a physical wallet size photo carries an emotional weight that no screen can replicate.
Furthermore, printing wallet photos at home is more economical than using a print lab, and with tools like ImagePrint, you can produce results that match professional quality — with complete control over cropping, colour, layout, and paper type.
Standard Wallet Size Photo Dimensions Explained
The most widely accepted wallet size photo dimensions in the United States are 2.5 × 3.5 inches (approximately 63.5 × 88.9 mm). This is the standard size you will find listed in photo labs, camera stores, and print-on-demand services across North America. It is also sometimes referred to as a “2R” photo, using the international R-series naming convention.
In some contexts — particularly in school photography packages and international markets — slightly different wallet dimensions appear. The table below summarises the most common variants:
| Name | Inches | Millimetres | Notes |
| US Standard (2R) | 2.5 × 3.5 in | 63.5 × 88.9 mm | Most common |
| US Small Wallet | 2 × 2 in | 50.8 × 50.8 mm | Square format |
| School Wallet | 2 × 3 in | 50.8 × 76.2 mm | Portrait packages |
| International Wallet | 2.5 × 3.5 in | 63.5 × 88.9 mm | Global standard |
For the purposes of this guide, we focus on the US standard wallet size photo of 2.5 × 3.5 inches, which is what ImagePrint lists as “Photo 2R” in its built-in paper size library.
Why Choosing the Correct Wallet Photo Size Matters
Selecting the correct dimensions before you start editing saves time and prevents disappointment. If you crop and resize your image at the wrong aspect ratio, you will end up with unwanted white borders, a stretched face, or a cut-off composition after printing.
The wallet size photo uses a 5:7 aspect ratio (2.5 inches wide by 3.5 inches tall). This means that for every 5 units of width, you need 7 units of height. Most modern digital cameras and smartphones shoot at a 4:3 or 16:9 ratio, so you will almost always need to crop your image before printing a wallet size photo. Getting this right at the start — before you adjust brightness or saturation — prevents you from doing colour work on a portion of the image you will later discard.
Additionally, the correct size ensures that your printer does not scale the image automatically. ImagePrint lets you set the image dimensions explicitly, which keeps you in full control of the output.
Wallet Photo Size Compared to Other Common Photo Formats
Understanding where the wallet size photo sits among other print sizes helps you choose the right format for each purpose. The comparison below puts the wallet print in context:
- Wallet (Photo 2R) — 2.5 × 3.5 in: The smallest standard print. Fits inside a wallet or purse. Perfect for portraits, keepsakes, and identity booklets.
- 3.5 × 5 in (Photo 3R): A small desk print, about the size of a postcard. Suitable for school photos or informal portrait displays.
- 4 × 6 in (Photo 4R): The most common home-printing size. Good for landscape scenes and general photography.
- 5 × 7 in (Photo 5R): A medium portrait print, often used in frames.
- 8 × 10 in (Photo 8R): A classic studio portrait size, suitable for wall display.
The wallet size photo is therefore at the intimate, personal end of the spectrum. Because of its small dimensions, image quality and precise cropping matter enormously — a blurry or poorly framed wallet photo is immediately obvious. That is why using a dedicated printing tool like ImagePrint, rather than a generic word processor, makes such a difference.
Capturing the Best Photos for Wallet Printing
Because the wallet size photo is small, sharpness is critical. Use the following tips to capture images that will look their best at 2.5 × 3.5 inches:
- Shoot at the highest resolution your camera or phone allows. More pixels give you more flexibility when cropping to the 5:7 ratio.
- Use natural, even lighting. Harsh shadows look more pronounced on small prints. Overcast daylight or a softbox indoors works beautifully.
- Keep the background clean and uncluttered. A plain or gently blurred background focuses attention on the subject.
- For portrait wallet photos, leave space above the head and capture the shoulders. This gives you room to crop without cutting off the face.
- Hold the camera steady or use a tripod. Even slight camera shake becomes visible on a 300 DPI print.
- If shooting outdoors, avoid midday harsh sun. Golden hour light — early morning or late afternoon — produces warmer, more flattering results.
Step-by-Step Guide to Preparing Wallet Size Photos in ImagePrint
ImagePrint makes printing wallet size photos straightforward. Follow these steps carefully, and you will produce professional-quality prints every time.
Step 1: Set Up Your Page
Open ImagePrint and immediately configure the page size. Click the ![]() Page Setup button on the main toolbar, or press Ctrl+Shift+P. In the Page Setup dialog, click Browse… to find the paper size you intend to load into your printer — typically Letter (8.5 × 11 in) or A4 (210 × 297 mm). Select Portrait orientation. Set your margins to match your printer’s minimum margin — 0.5 inches is a safe default for most home printers. Click OK to confirm.
Page Setup button on the main toolbar, or press Ctrl+Shift+P. In the Page Setup dialog, click Browse… to find the paper size you intend to load into your printer — typically Letter (8.5 × 11 in) or A4 (210 × 297 mm). Select Portrait orientation. Set your margins to match your printer’s minimum margin — 0.5 inches is a safe default for most home printers. Click OK to confirm.
Tip: Always match the ImagePrint page size to the actual paper loaded in your printer. If they differ, the printed wallet photos will not align with what you see on screen.
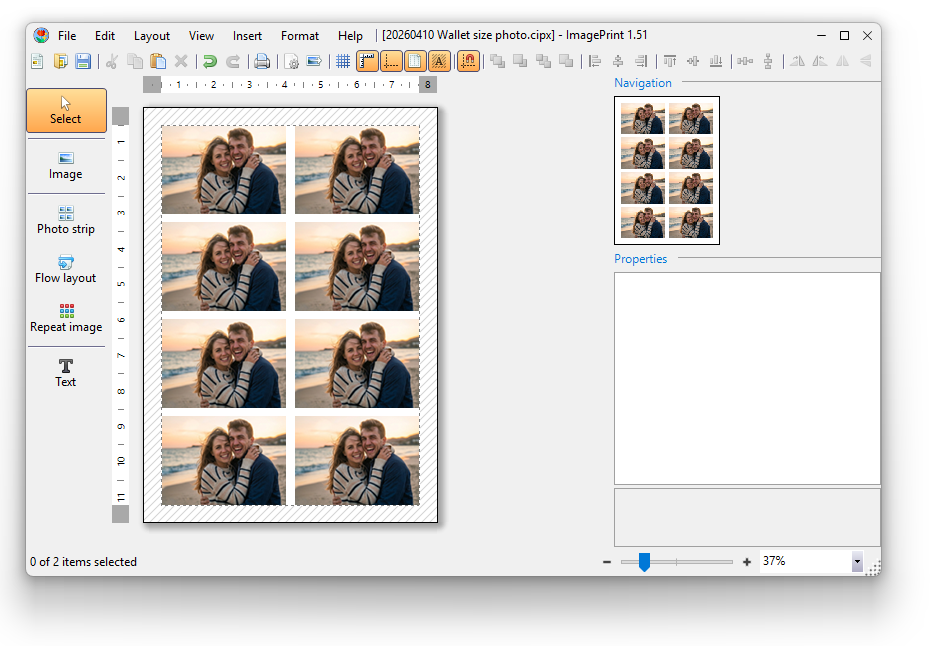
Step 2: Add a Repeat Image Container
Click the ![]() Repeat Image button in the left toolbox. A container shape appears on the page. Drag it to the upper-left corner of the white printable area — avoid the cross-hatched margin zones. ImagePrint will automatically snap the container to the page margins when you release the mouse. The
Repeat Image button in the left toolbox. A container shape appears on the page. Drag it to the upper-left corner of the white printable area — avoid the cross-hatched margin zones. ImagePrint will automatically snap the container to the page margins when you release the mouse. The ![]() Repeat Image container is ideal for wallet photos because it duplicates one image multiple times across the page, filling it with identical prints that you can cut apart after printing.
Repeat Image container is ideal for wallet photos because it duplicates one image multiple times across the page, filling it with identical prints that you can cut apart after printing.
In the Properties panel on the right side, configure the following settings for a clean 2 × 4 grid of wallet photos:
- Grid — set Columns to 2 and Rows to 4.
- Alignment — set to Stretch, Stretch (both horizontal and vertical).
- Full page width — set to true.
- Page break — set to true.
- Spacing — set to 0 (zero).
Step 3: Add Your Photo
Double-click inside the Repeat Image container, or click the ![]() Add images button on the context toolbar that appears above the container. Browse to your photo on your hard drive and click Open. ImagePrint immediately fills the grid with repeating copies of your image. Alternatively, you can drag and drop the photo from Windows File Explorer directly into the container. Remember to hold the Ctrl key while dragging to ensure the image lands inside the container rather than on the page background.
Add images button on the context toolbar that appears above the container. Browse to your photo on your hard drive and click Open. ImagePrint immediately fills the grid with repeating copies of your image. Alternatively, you can drag and drop the photo from Windows File Explorer directly into the container. Remember to hold the Ctrl key while dragging to ensure the image lands inside the container rather than on the page background.
ImagePrint supports over 120 image formats, including JPG, PNG, HEIC, RAW, AVIF, PDF, and many more — so you can import photos directly from your camera, iPhone, or Android device without converting them first.
Step 4: Resize the Image to Wallet Photo Dimensions
Click on one of the repeated photos to select it, then click the ![]() Resize button on the image context toolbar. The Image Size dialog opens. Click the Standard Print tab, then click Browse… next to the Photo size dropdown. In the paper size browser, type “2R” or “2.5” in the filter box. Select Photo 2R (2.5 × 3.5 in) from the list and click OK.
Resize button on the image context toolbar. The Image Size dialog opens. Click the Standard Print tab, then click Browse… next to the Photo size dropdown. In the paper size browser, type “2R” or “2.5” in the filter box. Select Photo 2R (2.5 × 3.5 in) from the list and click OK.
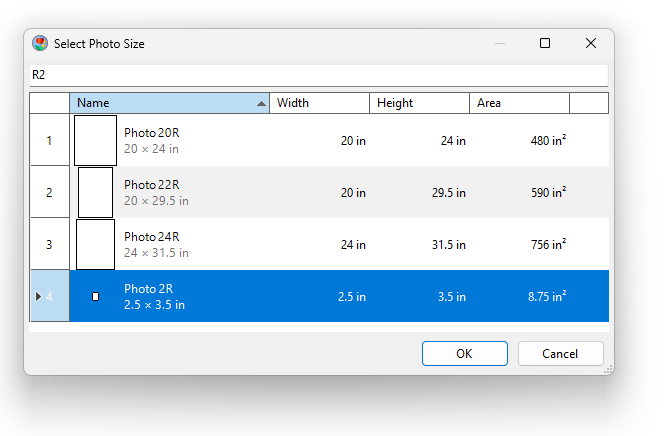
Make sure the Orientation is set to Portrait and that Exclude Page Margins is unchecked. Click OK to apply. ImagePrint resizes and crops all repeated copies of your image to the exact 2.5 × 3.5-inch wallet size photo. The live canvas immediately reflects the change.
Alternatively, if you need to select all images in the ![]() Repeat Image container at once and resize them together, click the Repeat Image container to select it, then press
Repeat Image container at once and resize them together, click the Repeat Image container to select it, then press ![]() Select all images on the context toolbar. Then click the
Select all images on the context toolbar. Then click the ![]() Resize button on the image context toolbar to open the Image Size dialog and apply the 2R size to all images simultaneously.
Resize button on the image context toolbar to open the Image Size dialog and apply the 2R size to all images simultaneously.
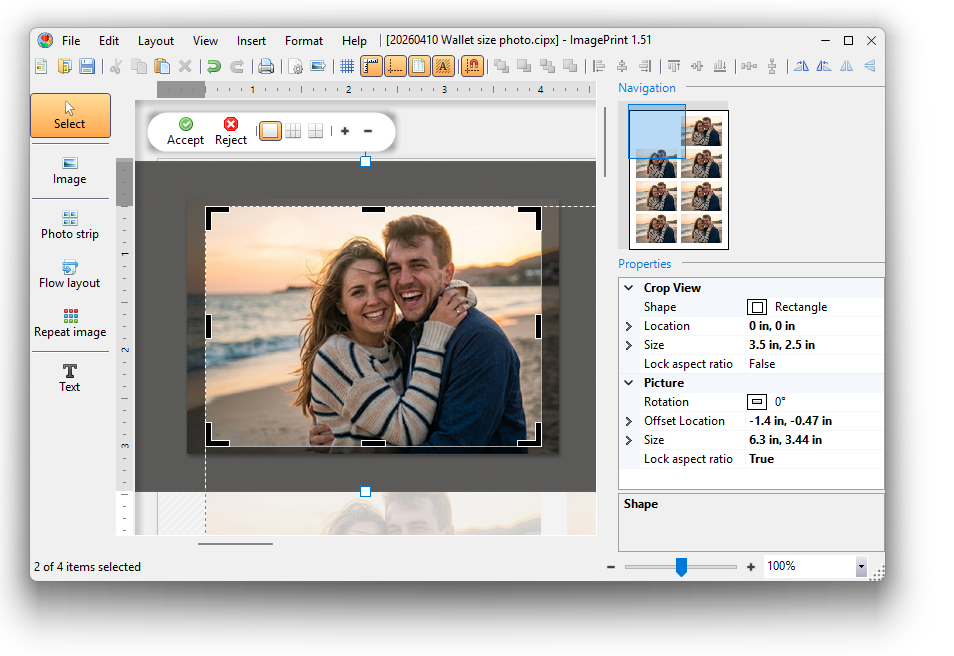
Step 5: Fine-Tune Your Crop
The ![]() Resize tool applies an automatic crop, but you may want to adjust the composition — for example, to centre a face more precisely. Click the
Resize tool applies an automatic crop, but you may want to adjust the composition — for example, to centre a face more precisely. Click the ![]() Crop Image button on the image context toolbar. The rest of the page dims, highlighting your crop area.
Crop Image button on the image context toolbar. The rest of the page dims, highlighting your crop area.
Drag the black corner handles to adjust the visible area. Move the mouse to the edge of the crop frame, then click and drag to reposition which part of the photo shows through. Use the ![]() Rule of Thirds overlay guide on the context toolbar to help you position the subject at a visually pleasing intersection point. When satisfied, click Accept or press Enter. Press
Rule of Thirds overlay guide on the context toolbar to help you position the subject at a visually pleasing intersection point. When satisfied, click Accept or press Enter. Press ![]() Undo (Ctrl+Z) at any time to reopen the crop tool and adjust again.
Undo (Ctrl+Z) at any time to reopen the crop tool and adjust again.
You can also use the ![]() Zoom In and
Zoom In and ![]() Zoom Out buttons on the context toolbar to adjust the framing, or click
Zoom Out buttons on the context toolbar to adjust the framing, or click ![]() Move Picture to drag the face to the ideal position within the crop frame.
Move Picture to drag the face to the ideal position within the crop frame.
Step 6: Adjust Colours for a Professional Look
Click on a photo inside the container, then click ![]() Image Corrections on the context toolbar (or double-click the image). The Image Corrections dialog opens. For beginners, start by clicking Auto Correct — ImagePrint analyses the image and automatically adjusts brightness, contrast, and colour balance. This often produces good result in one click.
Image Corrections on the context toolbar (or double-click the image). The Image Corrections dialog opens. For beginners, start by clicking Auto Correct — ImagePrint analyses the image and automatically adjusts brightness, contrast, and colour balance. This often produces good result in one click.
If you want to go further, use the sliders for fine adjustments:
 Brightness: Increase slightly if the photo looks dim on screen. Be careful not to overexpose bright areas.
 Contrast: A small boost (5–10 points) makes wallet photos look crisper and more vibrant.
 Saturation: A subtle increase makes skin tones and backgrounds richer. Avoid excessive saturation as it looks unnatural on print.
 Temperature: If the photo has a yellow indoor cast, cool it down slightly. If it looks too blue, warm it up.
 Gamma: Use this instead of Brightness when the midtones look flat but the highlights and shadows are correct.
The live preview panel on the right side of the dialog updates in real time as you move the sliders. Click OK to apply your changes, or Reset to start over. You can also use ![]() Auto Correct on the
Auto Correct on the ![]() Repeat Image container context toolbar to automatically adjust all photos in the container simultaneously.
Repeat Image container context toolbar to automatically adjust all photos in the container simultaneously.
Step 7: Add Bleed and Trim Marks (Optional but Recommended)
If your wallet photos have a light or white background, it is difficult to know exactly where to cut after printing. ImagePrint solves this with built-in Bleed and Trim Marks settings in the Properties panel.
Select an image in the Repeat Image container. In the Properties panel on the right, set Bleed to approximately 3 mm (1/8 inch) — the industry standard for small photo prints. You will see a semi-transparent darker border appear around each wallet photo, representing the bleed area. Next, set Trim marks to true. Small lines now appear just outside each photo’s final edge, showing precisely where to cut. These cut guides make it possible to produce clean, professional-looking wallet size photos with straight edges every time.
For the cleanest possible cuts, consider using a dedicated wallet photo punch cutter rather than scissors. Photo punch cutters are available for 2.5 × 3.5 inch wallet prints and produce perfectly straight, consistent edges without any wobble.
How to Print Your Wallet Size Photos in ImagePrint
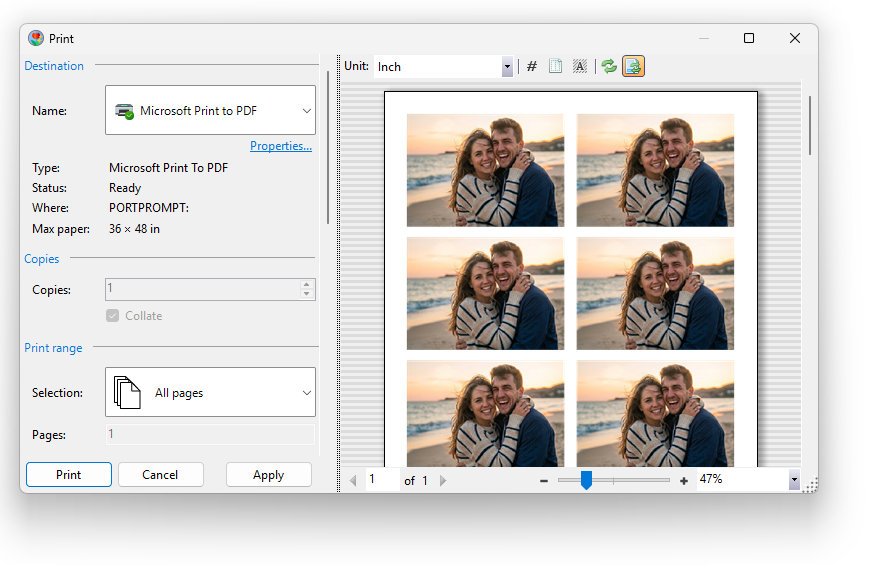
Once your layout looks exactly right on screen, click the ![]() Print button on the main toolbar or press Ctrl+P. The comprehensive Print dialog opens.
Print button on the main toolbar or press Ctrl+P. The comprehensive Print dialog opens.
Configure the following settings for the best wallet photo print:
- Destination: Select your printer from the dropdown. Make sure it shows “Ready” in the Status field before proceeding.
- Paper size: Set to match the actual paper in your printer — Letter or A4, and equal to the page size specified in the
 Page Setup dialog. Confirm this before every print.
 - Paper type: Select Photo Paper (Glossy or Satin) if you are printing on photo paper. This tells the printer how much ink to apply and how to dry it.
- Quality: Set to 1200 DPI for wallet photos. This produces fine, sharp detail and smooth colour transitions on a 2.5 × 3.5 inch print.
- Color mode: Leave set to Color unless you specifically want a black-and-white portrait.
- Scale: Leave at 100%. Never scale wallet photos in the Print dialog — resize them on the canvas instead.
- Copies: Increase this number if you want multiple printed sheets.
Check the live preview panel on the right side of the Print dialog to confirm the layout looks correct. Scroll through all pages using the arrow buttons below the preview. When everything looks right, click Print.
Pro tip: Do a test print on plain paper first. Wallet photos use small amounts of ink, so a test print costs very little. Check that the grid aligns correctly and that the crop is centred before using your photo paper.
How to Export Wallet Photos to PDF
Sometimes you want to share your wallet photo layout digitally — perhaps to send to a print lab, share with a family member, or archive it for later reprinting. ImagePrint makes this simple through its Export to PDF feature.
Click the ![]() Export button on the main toolbar, or press Ctrl+E. In the file dialog that appears, choose a save location and ensure the file type dropdown is set to Portable Document Format (*.pdf). Click Save. The PDF Export dialog then opens with the following key settings:
Export button on the main toolbar, or press Ctrl+E. In the file dialog that appears, choose a save location and ensure the file type dropdown is set to Portable Document Format (*.pdf). Click Save. The PDF Export dialog then opens with the following key settings:
- Page size: Must match your ImagePrint page size exactly (Letter or A4). ImagePrint pre-selects this automatically, but always verify.
- Orientation: Portrait for a standard wallet photo layout.
- Resolution: Set to 300 DPI for a print-ready PDF, or 72 DPI if you only need to share it digitally via email.
- Scale: Leave at 100%.
Click Publish to create the PDF ![]() . The resulting file faithfully captures your wallet size photo layout at the exact dimensions you set on the ImagePrint canvas. You can then open the PDF in any PDF viewer, send it to a print lab, or upload it to an online printing service.
. The resulting file faithfully captures your wallet size photo layout at the exact dimensions you set on the ImagePrint canvas. You can then open the PDF in any PDF viewer, send it to a print lab, or upload it to an online printing service.
Creative and Modern Ways to Use Wallet Size Photos
The wallet size photo is far more versatile than its small dimensions suggest. Here are some creative applications that go beyond simply tucking a portrait into a cardholder:
- Holiday gift tags: Print a wallet size photo of you or your family, punch a hole in the corner, and use it as a personalised gift tag on a wrapped present.
- Scrapbooking: Wallet photos are the perfect size for scrapbook layouts, especially for multi-person group shots and event montages.
- Vision boards: Print motivational images, travel destinations, or personal goals at wallet size and arrange them on a board or journal.
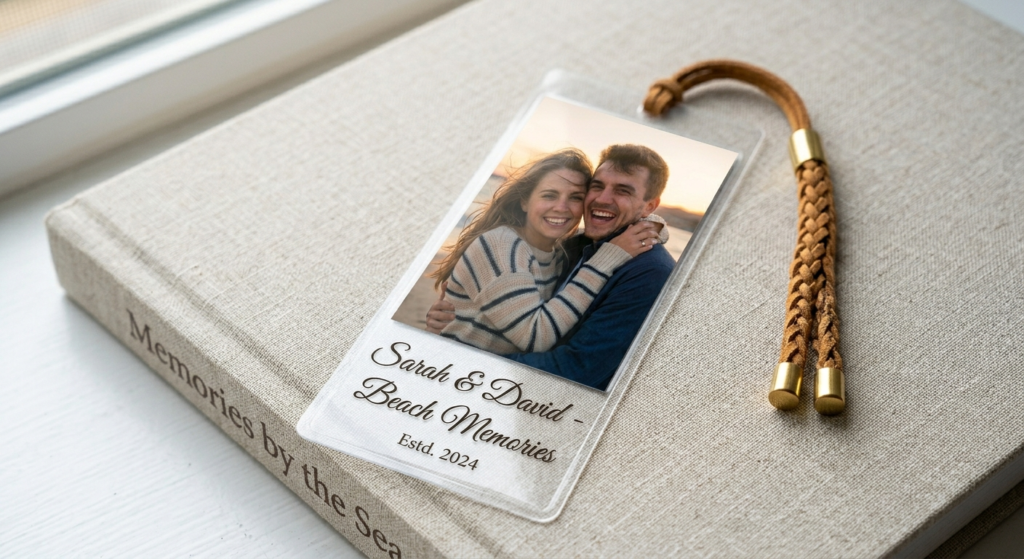
- Personalised bookmarks: Laminate a wallet photo for a durable, personal bookmark. Children love having their own face or a pet photo as a bookmark.
- Business cards with photos: Real estate agents, coaches, and personal trainers can add a professional headshot to a business card layout using the 2 × 3.5 inch format in ImagePrint.
- Team and club cards: Sports teams often exchange photo cards with schedules or statistics on the back — wallet size is the standard format.
- Event favours: Print a collage of event photos as a wallet keepsake for wedding guests or birthday party attendees.
- Charity fundraisers: Schools raise money by selling wallet photo packages — ImagePrint makes it easy to lay out and print an entire class in one go.
Avoiding Common Mistakes with Wallet Size Photos
Even experienced home printers make avoidable errors with wallet photos. The mistakes below are the most frequent — and the easiest to fix once you know about them.
- Wrong aspect ratio: The wallet size photo has a 5:7 ratio (2.5 × 3.5 inches). Cropping to a square or 4:3 rectangle first will result in white bars or unexpected cut-offs. Always set your target size in ImagePrint before cropping.
- Too low a resolution: A wallet size photo printed at 300 DPI requires at least 750 × 1050 pixels in your source image. Most modern phone cameras capture far more than this, but older or heavily compressed photos may look soft. Check your pixel count before printing.
- Wrong page size in Print dialog: If your ImagePrint page is Letter but the printer is set to A4, the photos will shift or be cut off. Always verify both match before clicking Print.
- Ignoring paper type: Using the “Plain paper” setting while printing on glossy photo paper causes ink to pool, bleed, and dry incorrectly. Always select the correct paper type in the Print dialog.
- Scaling in the printer driver: Some printer drivers apply their own scaling. If you set scaling in both the ImagePrint Print dialog and the printer driver’s Properties dialog, the scaling is applied twice, producing tiny or oversized photos. Keep both at 100%.
- No test print: Skipping the plain-paper test print wastes expensive photo paper. A test print takes seconds and saves frustration.
- Cutting without trim marks: Without trim marks, hand-cutting wallet photos nearly always produces slightly uneven edges. Enable Trim marks and Bleed in ImagePrint for precise, consistent results.
Tips for Keeping Wallet Photos Looking Great Over Time
A beautifully printed wallet size photo deserves to last. Follow these simple care tips to preserve your prints for years:
- Use archival-quality photo paper. Acid-free, pigment-ink-compatible papers resist yellowing and fading far longer than budget glossy paper.
- Allow prints to dry completely before handling. Photo paper takes 15–30 minutes to fully cure after printing. Touching a wet print can smear the ink.
- Store wallet photos in a cool, dry, and dark place when not carrying them. Heat, humidity, and UV light are the main enemies of photo longevity.
- Carry wallet photos inside a plastic sleeve or card protector. Direct contact with leather wallet linings can transfer oils that damage the print surface over time.
- Avoid exposure to direct sunlight for extended periods. UV radiation fades pigments, especially on dye-based ink prints.
- Keep prints away from solvents, cleaning products, and adhesive tape. These can dissolve the ink layer or leave residue.
Final Thoughts on Mastering Wallet Size Photos
The wallet size photo — just 2.5 × 3.5 inches — packs a remarkable amount of emotional power into a very small space. When you get the size right, the crop just so, the colours balanced, and the paper perfectly chosen, the result is a print that people treasure for decades.
ImagePrint removes the guesswork from every stage of this process. Its ![]() Repeat Image container handles the grid layout automatically, the built-in
Repeat Image container handles the grid layout automatically, the built-in ![]() Resize tool applies the exact 2R dimensions, the
Resize tool applies the exact 2R dimensions, the ![]() Image Corrections dialog fine-tunes colours with real-time preview, and the comprehensive Print dialog puts you in complete control of quality and paper settings. The Export to PDF feature means you can also send a print-ready file to a professional lab with a single click.
Image Corrections dialog fine-tunes colours with real-time preview, and the comprehensive Print dialog puts you in complete control of quality and paper settings. The Export to PDF feature means you can also send a print-ready file to a professional lab with a single click.
Whether you print eight wallet photos per sheet on Letter paper, or a full page of portraits on A4, ImagePrint gives you the professional-grade results and the ease of use that beginners appreciate — all from your home computer and printer.
Frequently Asked Questions About Wallet Size Photos
How many wallet size photos fit on one sheet of Letter paper?
On a standard Letter sheet (8.5 × 11 inches) with half-inch margins, you can fit eight wallet size photos in a 2-column, 4-row grid. ImagePrint’s Repeat Image container sets this up automatically — just configure Columns to 2, Rows to 4, and set Spacing to zero.
What resolution do I need for a wallet size photo?
For a 300 DPI print at 2.5 × 3.5 inches, you need at least 750 × 1050 pixels. For 600 DPI, you need 1500 × 2100 pixels. Most smartphones produce images of 3000 × 4000 pixels or more, so resolution is never a concern with modern phone cameras.
Can I print wallet size photos on plain paper?
Yes, plain paper works for test prints. However, for final wallet photos, use a dedicated photo paper (glossy, satin, or matte) for the best colour reproduction, sharpness, and durability. Remember to set the Paper type in ImagePrint’s Print dialog to match the paper you have loaded.
Is a wallet size photo the same as a passport photo?
No. The standard US passport photo is 2 × 2 inches (a square), while the wallet size photo is 2.5 × 3.5 inches (a rectangle). ImagePrint includes a full built-in library of passport and ID photo sizes for over 400 document types across hundreds of countries, accessible through the ID / Passport tab in the Image Size dialog.
What is the correct aspect ratio for a wallet size photo?
The aspect ratio of a wallet size photo is 5:7 (width:height). This means for every 5 units of width, there are 7 units of height. When you select Photo 2R in ImagePrint’s Resize dialog, the application automatically applies the correct 5:7 crop ratio to your image.
How do I export wallet size photos from ImagePrint to send to a print lab?
Press Ctrl+E to open the Export dialog, select PDF ![]() as the output format, set Resolution to 300 DPI, and make sure the Page size matches your layout. Click Publish to save the file. The resulting PDF preserves your exact wallet photo layout and dimensions, ready to upload to any professional printing service.
as the output format, set Resolution to 300 DPI, and make sure the Page size matches your layout. Click Publish to save the file. The resulting PDF preserves your exact wallet photo layout and dimensions, ready to upload to any professional printing service.
What image formats does ImagePrint accept for wallet photos?
ImagePrint supports over 120 image formats, including JPG, JPEG, PNG, HEIC, AVIF, RAW, DNG, BMP, TIFF, GIF, WebP, PDF, and many camera-specific RAW formats from Canon, Nikon, Sony, Fujifilm, and others. Simply drag your photo into ImagePrint — no conversion necessary.